I was SO excited for my trip to Havasupai, that even the planning and packing was fun! Anyone else get like this? Just me? I did quite a bit of research – mostly through blogs and the Facebook group – and was really happy with my packing list. I’m sharing it with you and including links to almost everything. Not getting paid… I honestly love these products!
What: Havasupai/Havasu Falls in Arizona
click here for my full itinerary | click here for planning tips
When: Late March/Early April
How Long: Two nights and three days
Pack Weight: I forgot to weigh it, but I’d assume about 20 lbs. My boyfriend and I split up some of the gear (camera, food, etc.)
Budget: I had everything except for the stove set (~$60) and watershoes ($20 on clearance). I bought backpacking food from Backcountry for about $11 per meal. My favorite retailers are REI, Backcountry and Campsaver – always look for sales, clearance and coupons!

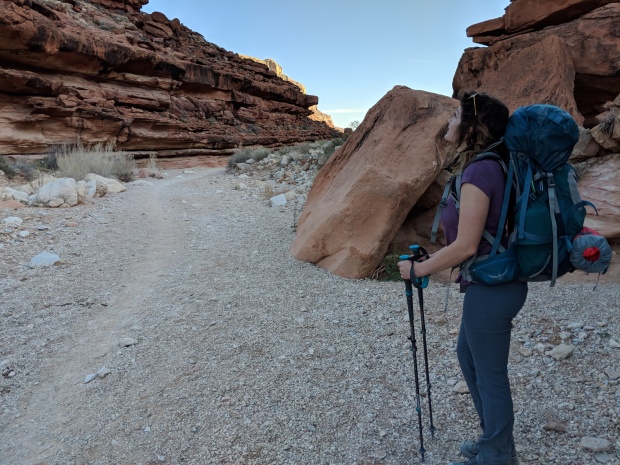
Taking one last look at Havasu Falls before the hike back up to the parking lot.
Click here for the simplified, printer-friendly version to customize and check off yourself!
Hike/Camp
- Backpacking pack: I have an Osprey Ariel 55 liter pack that I LOVE and was a great size for this trip. When choosing a pack, nothing beats trying on different brands loaded with 20-30 lbs and walking around the store. The staff at REI is really helpful in helping you find the right size and style.
- Day pack (OPTIONAL): I used the removable top lid of my main pack, or bring a pack-able day pack to carry on the day hike to Beaver Falls.
- Tent with rainfly: Even with no rain in the forecast, use the rain fly to keep dust from getting in your tent. While not necessarily a backpacking tent, I love my Optic 2.5 from Mountain Hardware.
- Hammock and straps: I didn’t want to carry the weight and ditched these last minute. BUT… if you’re visiting in the summer, this would be a nice alternative to the tent – cooler and lighter.
- Tent footprint (OPTIONAL): If you’re a minimalist packer, you don’t need this. But, it’s relatively light and worth protecting my tent for future trips. Your gear is an investment!
- Sleeping pad: I love my Sea2Summit Comfort Plus
- Sleeping bag: Women’s Heratio 32F from Mountain Hardware. Get one lightweight and rated for the weather you’re camping in.
- Sleeping bag liner (OPTIONAL): It’s light and keeps my sleeping bag clean!
- Trekking poles
- Headlamp and extra batteries
- Water bottle and 3 liter bladder: I brought both. I used the bladder while hiking in/out and for cooking at camp. I used my 32oz Hydroflask for the day hikes to the falls. There is a spring at the campsite to refill water.
- Dry/compression sacks (OPTIONAL): I highly recommend these for saving room in your pack and keeping things dry. I use an XS for clothing and S for my sleeping bag.
- First aid kit: mostly band-aids for blisters and ibuprofen for headache or sore muscles. Luckily, we didn’t use this at all.
- Pocket knife
- Paracord

Clothing
- Hiking pants: These Mountain Hardware pants are all I’ll wear! Get something comfortable that dries quickly.
- Shorts
- Wool T-shirt: I like wool in both summer and winter because it helps wick sweat away from your body and doesn’t get smelly ever after wearing for several days.
- 2-3 pairs of wool hiking socks: I only wear DarnTough! I always pack extra in case a pair gets wet.
- Hiking boots: I wore Lowa Renegades on this trip because that’s what I have. You could get away with a lighter hiking shoe or trail running shoe.
- Water shoes: I liked having these for swimming and the day hikes. I found a great clearance deal on Chacos at REI – here’s something similar.
- Sports bra
- Underwear: ExOffico are the ultimate travel underwear – they dry quickly for easy washing on the go. Look at the sale section online.
- Swimsuit: duh!
- Thermal underwear: I didn’t want to sleep in my dirty hiking pants and wore these when I got up at 3 a.m. to shoot Havasu Falls in the dark!
- Down jacket: I went in the early Spring and it could get chilly just sitting at camp. I’m obsessed with my Arc’teryx Cerium SL Jacket. These can get pricey, looks for outlets/sales.
- Baseball hat
- Hair ties
- Buff headware: I wore mine as a hat when the evenings got chilly. In warmer weather, it’d be nice to keep wet and wear around your neck.

Food/Cooking
- Storage: There are rodents that will get into your food and trash if not put away properly. We used buckets that were available from the ranger station and they worked perfectly (read more tips here!). I’ve heard of other hikers using a mesh metal bag or hanging a dry sack with rope from a tree. Don’t keep food in your pack or tent unattended. During day hikes, I kept my food sealed in plastic bags and didn’t have issues.
- Backpacking stove: I wanted one under $100 and that included everything I need to prepare a dehydrated meal and instant coffee. I was really happy with the GSI Outdoors Halulite Minimalist Complete Stove and Cookset.
- Camp utensil (fork, spoon and knife in one)
- Fuel canister (can’t fly with this): We used some left behind by other campers. You can also pick one up at REI or Walmart on your way to the trail.
- Lighter (can’t fly with this)
- Instant coffee
- Mountain House Dehydrated Meals: brought three-four for each person each day. Every flavor was pretty tasty! With snacks, we ended up bringing the perfect amount of food (my boyfriend and I eat a lot – especially when hiking)!
- Extra zip lock bags: Use these to carry snacks and protect items from getting wet. I used a gallon size to store all of our trash and carry it out of the canyon.
- Snacks: beef jerky, trail mix, protein bars, tuna packets, freeze dried ice cream to celebrate Byron’s birthday
- NOTE: There is a cafe/store in the village and fry bread huts at the campsite if you need more sustenance! The fry bread is totally worth it.


Other (but very important!)
- Reservation print out: they ask for it at the tourism office
- ID/Credit Card/Cash: bring cash for fry bread or if you need to take the helicopter
- Toiletries: deodorant, toothbrush, toothpaste, contact solution, contact case and glasses case, baby wipes, etc. Decide what’s worth it to you.
- Sunglasses
- Sunscreen/moisturizer combo: I love Paula’s Choice – great, safe product in a travel size
- Chapstick
- Lightweight towel: Packtowl in X-Large is my go-to travel item!
- Ear plugs: we fell asleep to the sound of the creek, but nice to have in case you have noisy neighbors or can’t sleep
- Cell phone: There’s no service, but used it for the camera. I also used the app that connects to my digital camera so I could use my phone as a shutter remote
Luxuries
Items you don’t necessarily need but were important/worth it for me!
- Camera with wide angel lens, two charged batteries and SD cards
- Tripod: This is my first tripod – I picked it because it was relatively affordable and lighter than others.
- Portable charger and cords for phones
- WISH I HAD: a pack-able camping pillow! Thought I didn’t need this, but it would have been nice. Any recommendations?
- WISH I HAD: sunglasses strap: they keep them around your neck if they fall and some of them float in water. Again, any recommendations?
Click here for the simplified, printer-friendly version to customize and check off yourself!

The tripod enabled me to capture long exposures such as this!
Any questions about gear? Is there something I missed? Let me know in the comments below! Also, check out my other posts about Havasupai before you go!


")


