
Are you always searching for your keys in a frantic rush? Is the dog’s leash hanging on a door somewhere? Consider displaying these functional items in a pretty, personal way with a DIY key hanger picture frame! This is something I’ve been meaning to do for a while, and I’m so happy with how it turned out. So happy, in fact, that I wanted to share in a blog post and branch out with an “At Home” section of Road and Air.
Materials you’ll need:
 A picture, artwork or patterned paper that you love enough to look at every day!
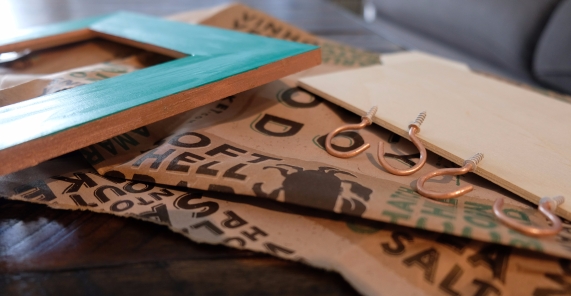
- Wood picture frame. I picked up this Hand Made Modern frame from Target. I love it because it’s ready to paint and ready to hang on your wall!
- Multi-surface paint. Here’s what I used:
- Main color: Hand Made Modern Satin in Jade
- Accent: Hand Made Modern Metallic in Light Copper (it reminded me of rose gold which I’m obsessed with right now #basic)
- Utility hooks. I obviously picked these up from Target as well: Arrow 1.25″ Cup Hooks (18 Pack)
- A hairdryer. Wait, what? Yes, a hairdryer
- Picture hanger. The one I used is rated for up to 20 lbs
- Two paintbrushes (or one if you’re patient and can use one color at a time)
- An electric drill (which I don’t have so I used a hammer and the pointy bit for my screwdriver)
- Marker
- Measuring tape
Now the fun part!
- Take the frame apart. You don’t need the glass panel or back yet. Right now we’re working with the frame itself.
- Use your main color to paint the front of the frame. Once dry, paint the inside and outside edges with your accent color (details, people!). Let the paint dry once more.
- Now re-attach the back of the frame – the stand is about to come in handy.
- I’m naturally a sloppy person, so this is the fun part! Use a large paint brush and GLOP your accent color on. Spread it thick across the border of your frame. Work with one edge at a time for best results!

- Use the hairdryer to blow the paint around for a fun pattern! I personally used it on the coolest temperature on the highest setting. I blew the paint downward and sometimes diagonally (the .gif below is not rotated correctly). I had to get the dryer right up next to the paint. Feel free to experiment with different settings and angles for the look you want.

- Repeat steps 4 and 5 on the next three sides, rotating the frame as you go. See, I told you the stand helps! Let dry.

- Measure the bottom of your frame and mark where you want the key hooks. This will depend on the size of your frame and how many hooks you want. Using the Hand Made Modern frame and three hooks, I measured two inches from the edges for the outside hooks and put the third hook in the middle of those.
- Use a drill (or my screwdriver and hammer method) to make holes where your marks are. Then screw in the hooks! I had the hooks so the opening was facing the left. This way the frame will lay flat when hung on the wall.
- Paint the key hooks with your accent color. I suspect my keys will chip the paint off eventually, but it looks cool for now! Use this opportunity to paint any spots that need a touch up.
- Ensure all the paint is dry and put the frame back together with your favorite photo!
- Optional: remove the stand from the back of the frame. I didn’t do this because it didn’t seem to be in the way, and you never know when it will come in handy. Oh, and if your frame doesn’t already have an attachment to hang it on the wall – screw one in.
- Hang on the wall using a traditional picture hanger. Mine is rated up to 20 lbs because that’s what I had.
- Hang keys, leash, etc.
- Admire your beautiful work and never be able to use the “I couldn’t find my keys” excuse again!

This easy DIY looks great and gives your entry way a unique, personal touch! Let me know in the comments if you make one of these or something similar – I’d LOVE to see your finished product!
I think the blown paint design kind of looks like mountains which tie into the photo I framed (my boyfriend, dog and I posing in front of a view of The Needle mountains in Colorado).
P.P.S. not sponsored by Target but I happened to pick all of this up during a spontaneous shopping spree there. Love their Hand Made Modern brand!
Enjoy!
